Exporting receipts
Connect an export app
You must first connect an export app before you can export receipts. See App integration for more information.
Export location
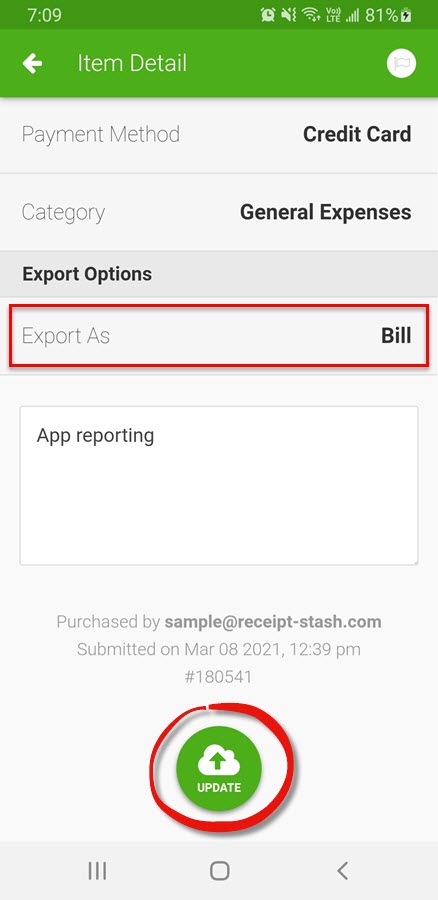
Choose the export location by pressing on the receipt item in your receipt list.
On the Item Detail screen, press Export As to change the export location. Save any changes to the receipt by pressing the green Update button at the bottom of the screen.

Exporting
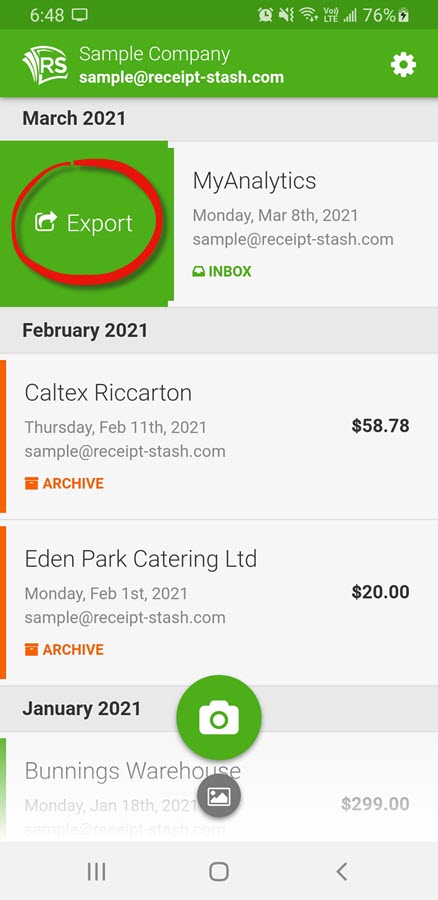
Swipe right on a receipt to expose the green Export button.
Press the Export button and confirm the action to begin exporting the receipt to yout connected app.
Once the receipt has successfully exported the status will change to Exported.

Export errors
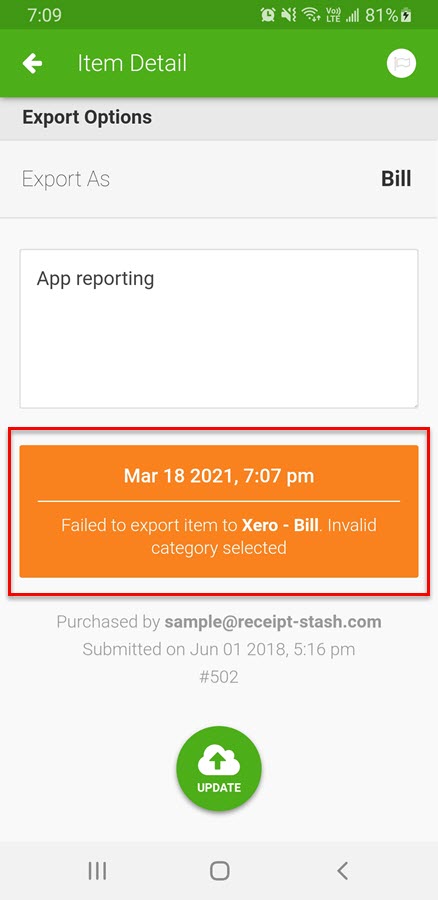
If an error occurs while exporting, the receipt status will change to Export Failed. Press on the receipt item in your receipt list.
Scroll to the bottom of the Item Detail screen to view the export error message.
