Exporting receipt data to CSV
Overview
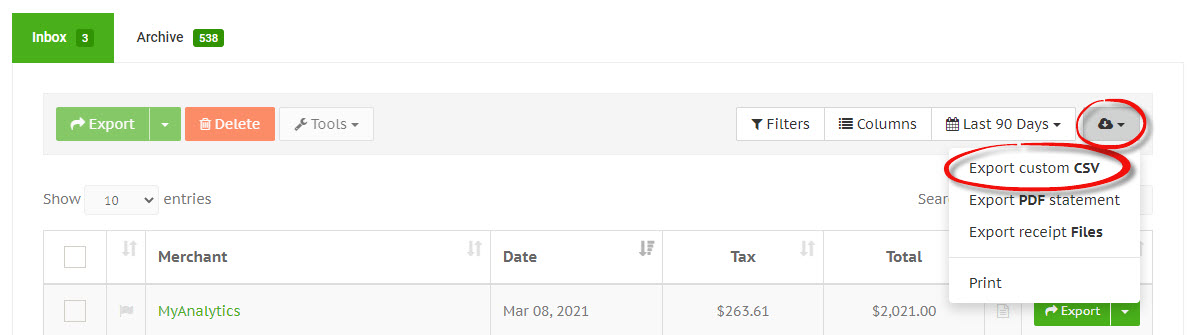
Navigate to the Receipts page and apply any filters (if necessary) to generate the required receipt data.
Click on the cloud download icon on the right-hand side of the tool bar, and then select Export custom CSV from the dropdown list.
Build a new export format
Select each field you want to include from the Field dropdown list, and type a custom header name for that field in the Field Label textbox.
To include additional fields, click the Add Export Field button, and to remove existing fields click the red trash icon on the right-hand side of the field row.
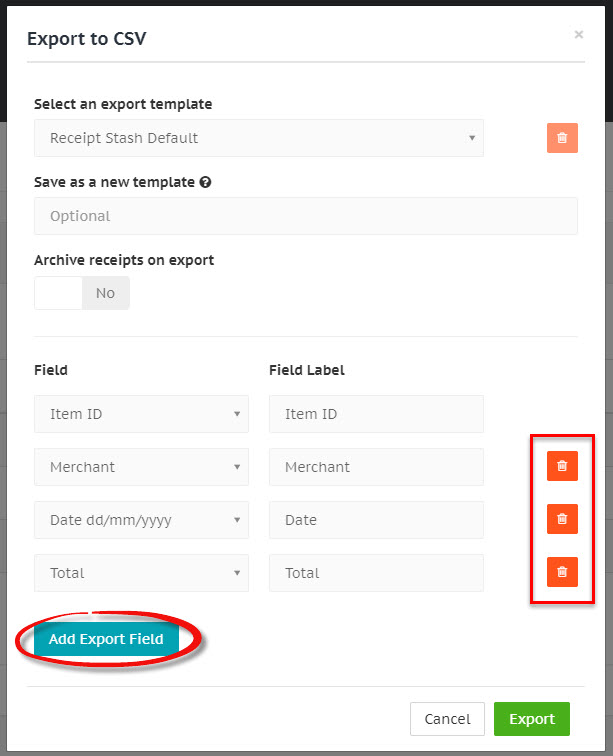
When you're ready to export your data, click the green Export button at the bottom of the window. If you had a value in the Save as a new template textbox, this will be added to the template dropdown list for quick re-use for future exports.
If you're exporting data from your inbox, you can also choose to automatically archive all receipts in the table when you download the CSV file.
Use an existing export template
To use an export template that has previous been saved, select the name from the Select an export template dropdown list. This will automatically generate the list of fields and field labels for your export.
Any changes made to the template will be automatically saved when you download the CSV file.
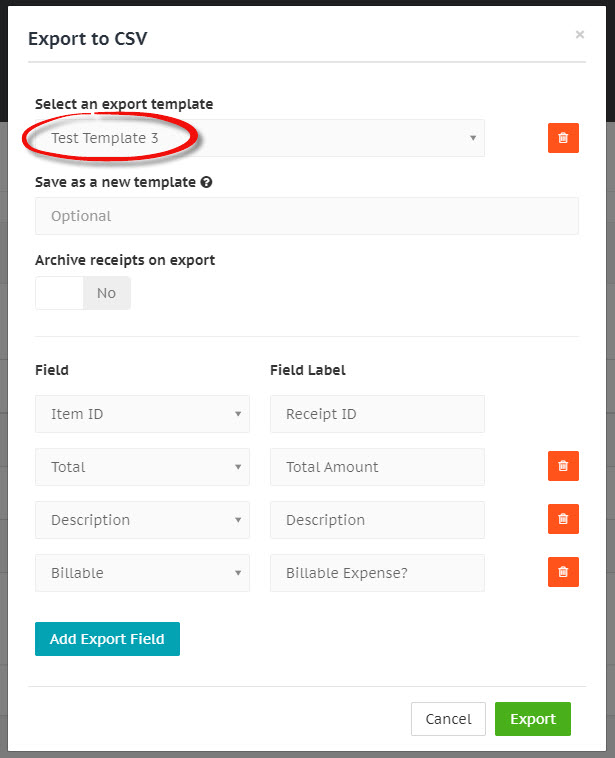
If you're exporting data from your inbox, you can also choose to automatically archive all receipts in the table when you download the CSV file.
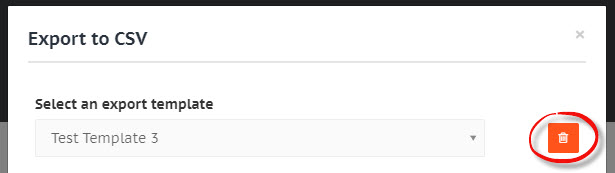
To delete an existing template, select it from the Select an export template dropdown list, and then click the red trash icon on the right-hand side of the template dropdown list.