QuickBooks setup
Connecting to QuickBooks Online
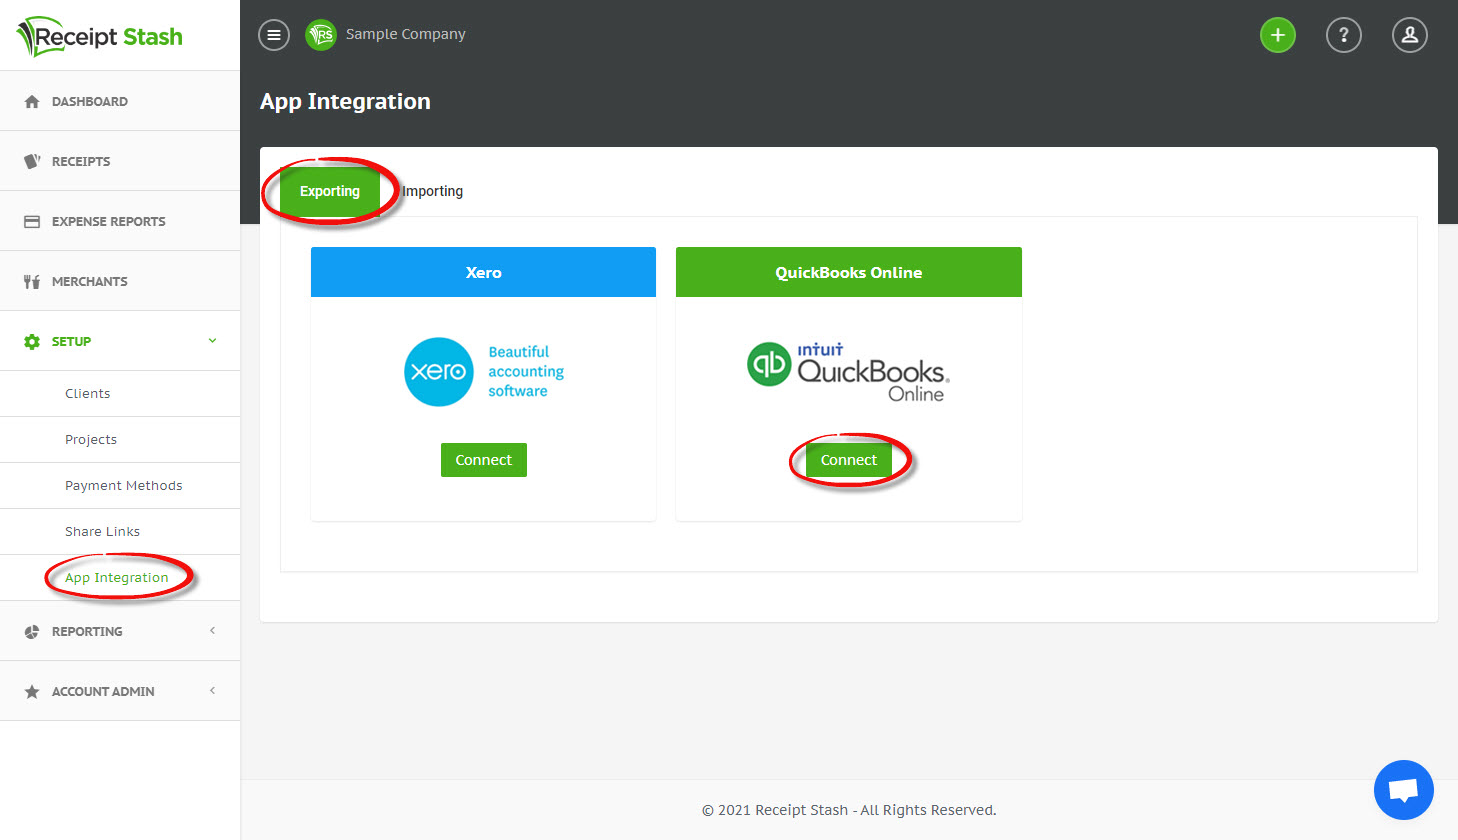
Navigate to Setup > App Integration and click on the Exporting tab.
Click the green Connect button in the QuickBooks Online panel and following the on-screen prompts to login to your QuickBooks account and allow access for Receipt Stash to connect.
QuickBooks Online integration settings
After initially connecting to QuickBooks, you will be prompted with an integration settings window.
You can configure your integration settings at this point or at any time by navigating to Setup > App Integration, clicking on the Exporting tab, and then clicking on the Settings button in the QuickBooks Online panel.
See QuickBooks Online integration settings to learn more.
Re-connecting to QuickBooks Online
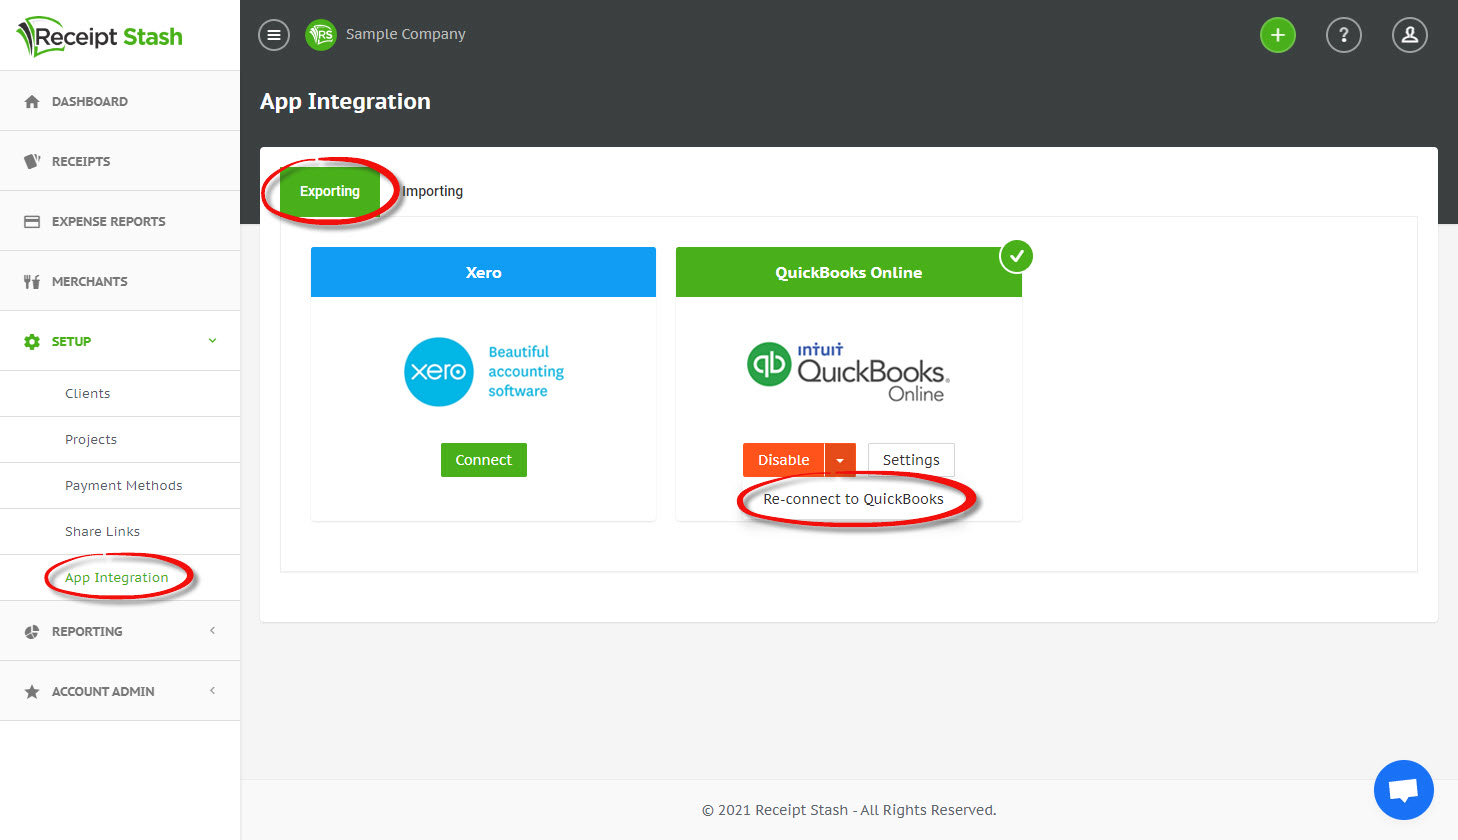
If your connection encounters a problem, you can re-connect to your QuickBooks account (or a different one) without needing to disconnect first.
Navigate to Setup > App Integration and click on the Exporting tab.
Click the down icon on the right-hand side of the Disable button in the QuickBooks Online panel and follow the same on-screen prompts you followed when originally connecting.
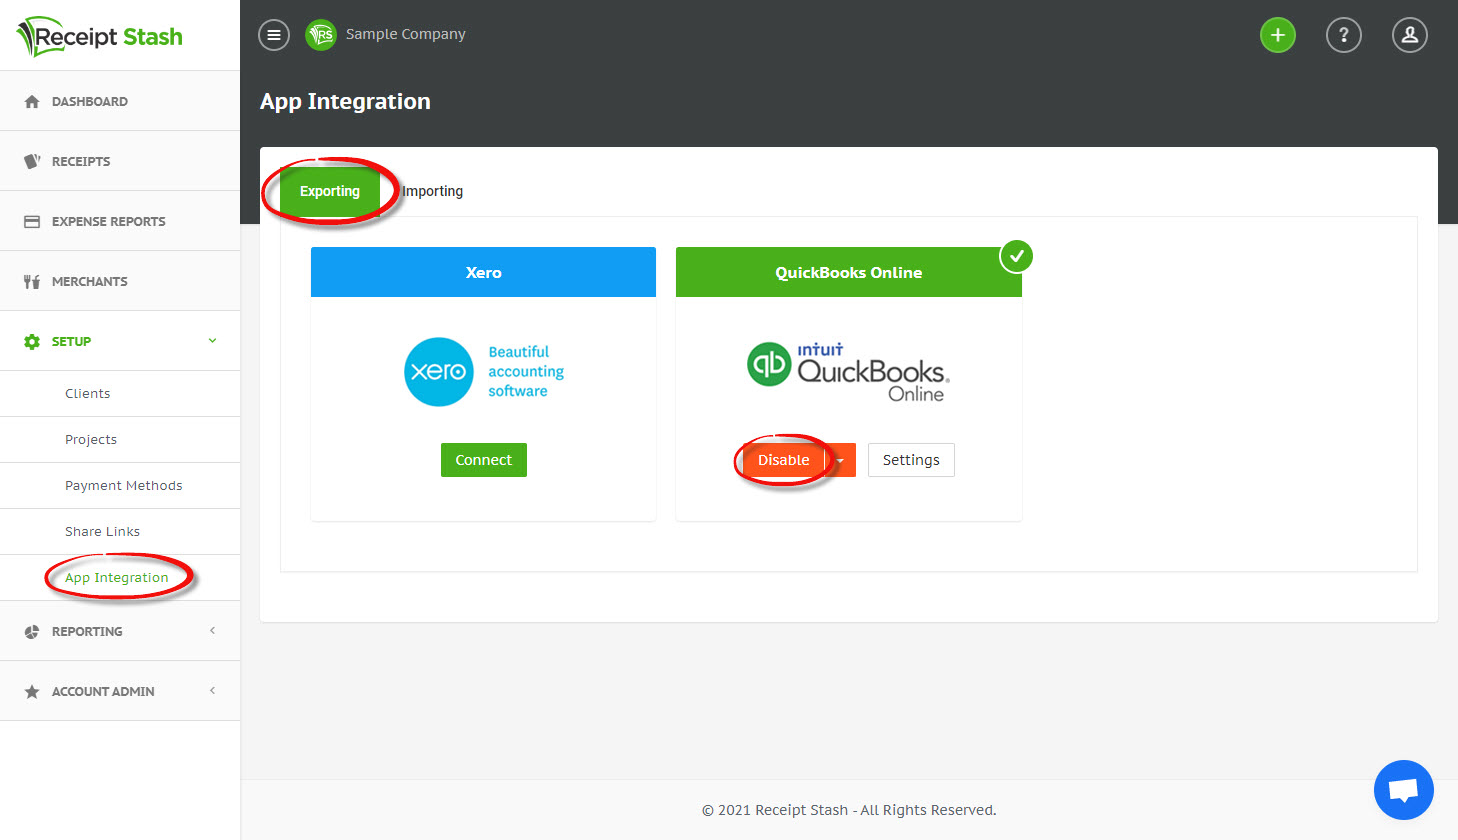
Disconnecting from QuickBooks Online
Navigate to Setup > App Integration and click on the Exporting tab.
Click the red Disable button in the QuickBooks Online panel and confirm the disconnection.