Exporting receipts to QuickBooks
Overview
Use the receipt Export As field to determine how and where the receipt should be published to in QuickBooks Online.
See Exporting receipts to learn more about the general exporting process.
Required fields
All export locations require the Category field to be selected as minimum before exporting. The Category field represents a GL code mapped to your Chart of Accounts list in QuickBooks Online.
See below to view specific data requirements for each export location.
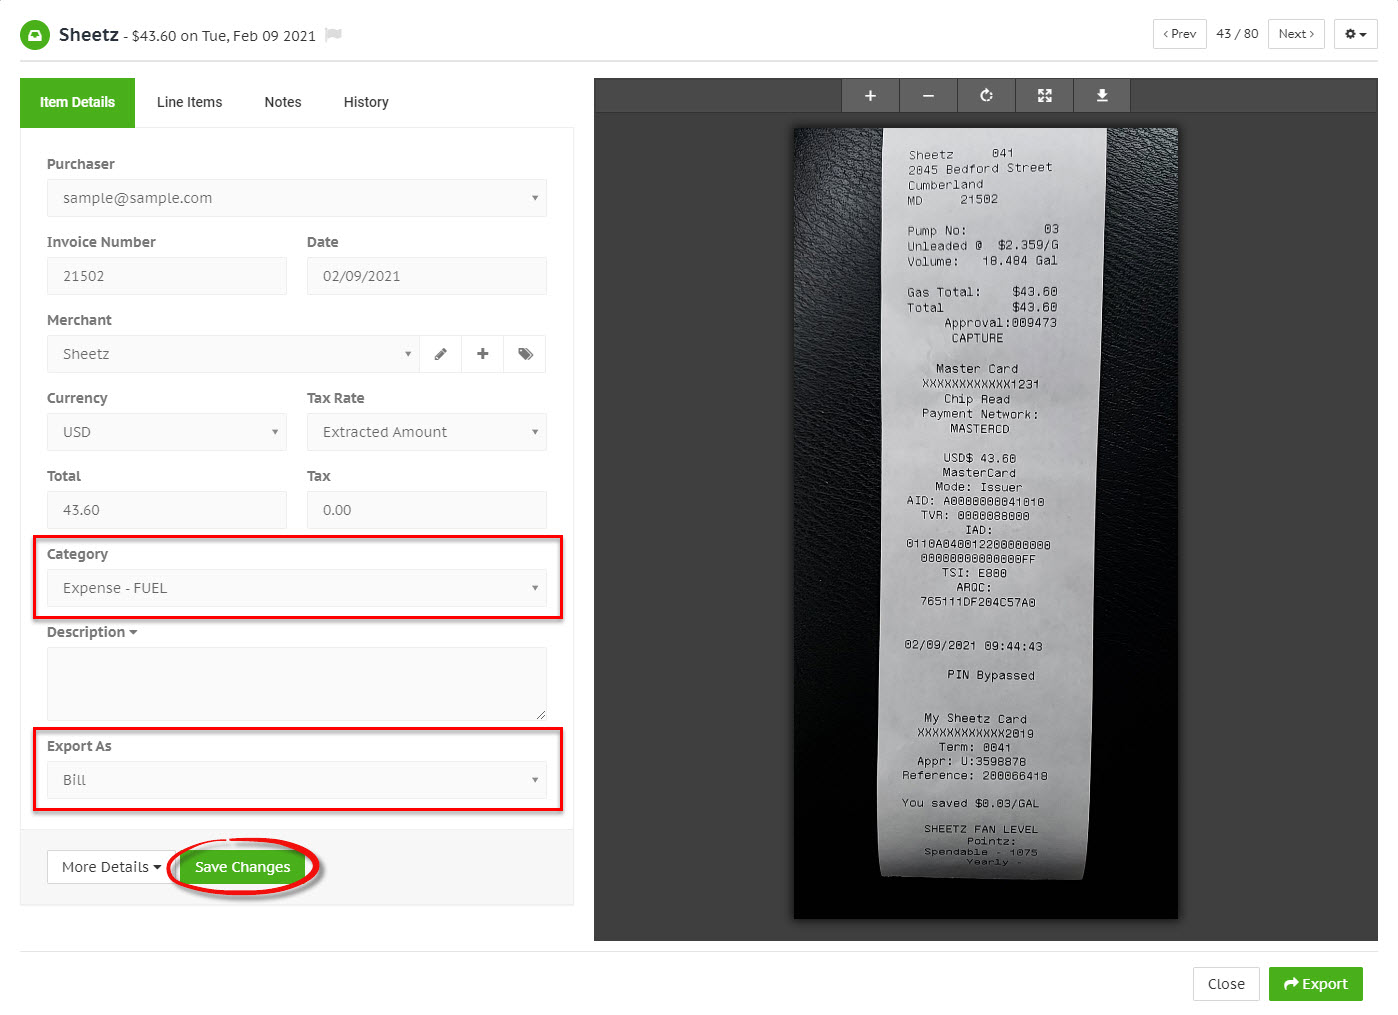
Bill
Export as a Bill when the receipt has not yet been paid.
Select a Category for the receipt and choose Bill from the Export As dropdown list.
Click the green Save Changes button at the bottom of the Item Details tab to confirm any changes before you export to QuickBooks Online.
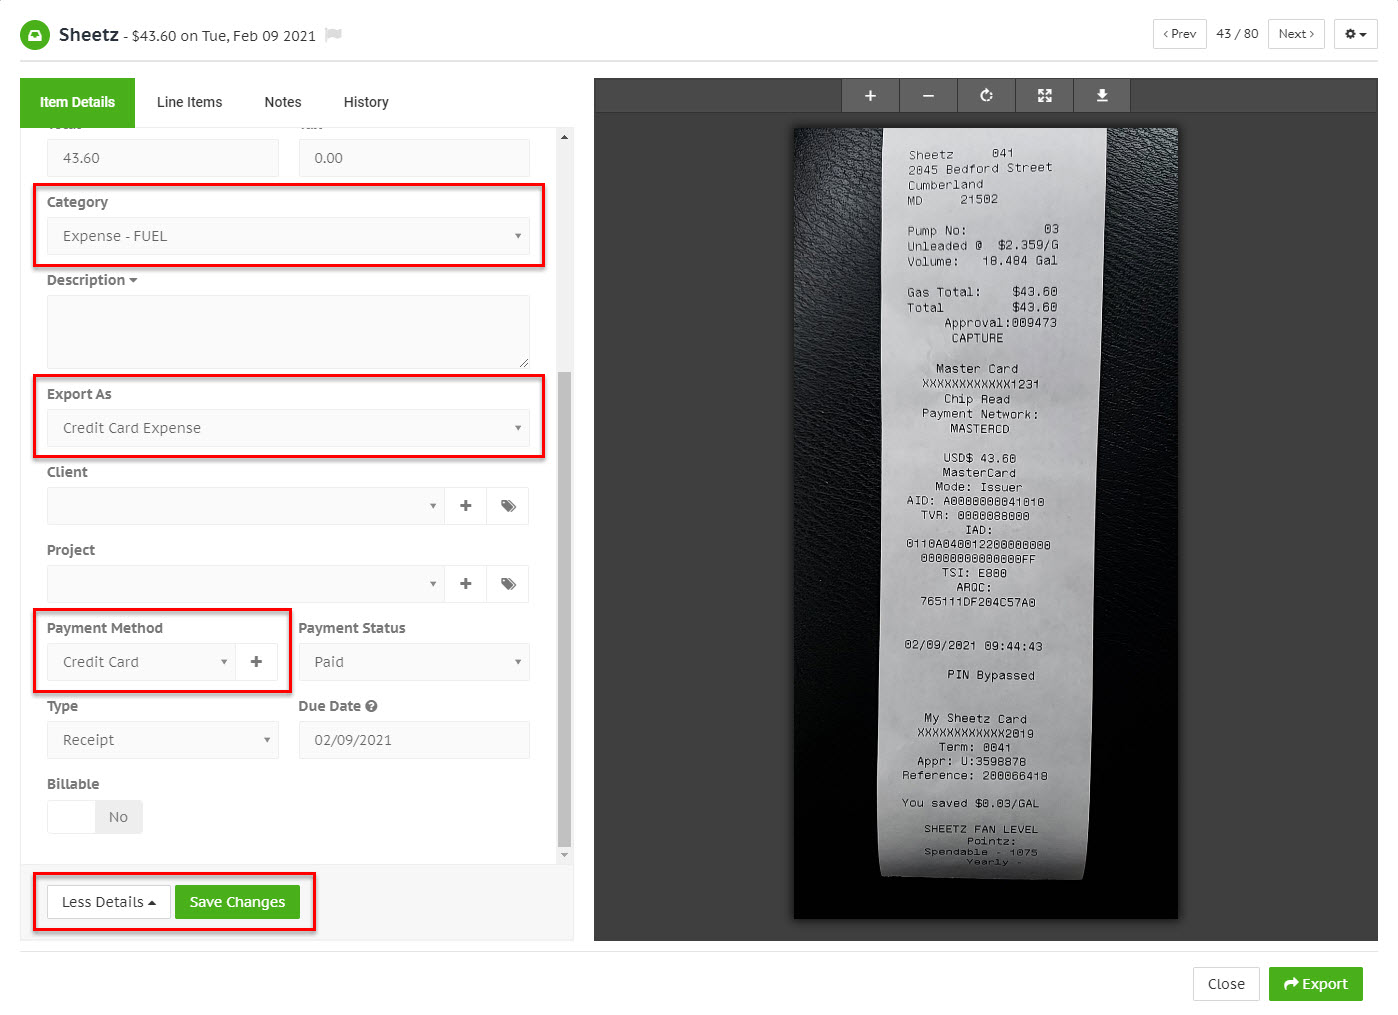
Expense
Export as an Expense when the receipt has already been paid.
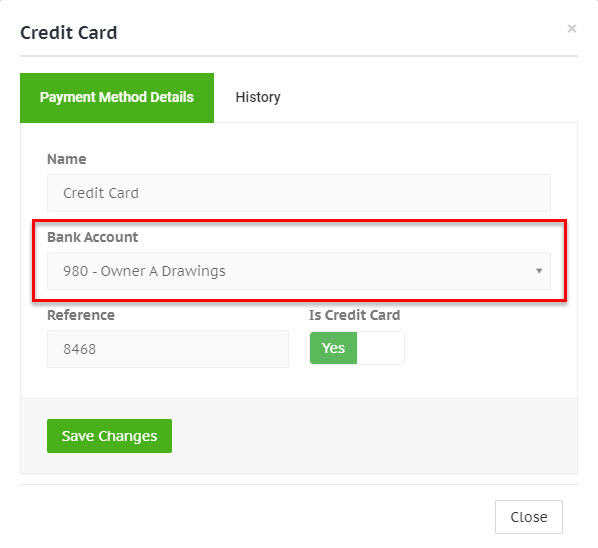
In order to determine which bank account in QuickBooks to log the expense payment against, the receipt must be assigned a Payment Method, and that payment method must be linked to a QuickBooks bank account.
Click the More Details button at the bottom of the receipt Item Details tab and choose a payment method that's linked to a QuickBooks Online bank account from the Payment Method dropdown list, or create a new one by clicking the + button on the right-hand side of it.
Select a Category for the receipt and choose one of the following expense types from the Export As dropdown list:
- Cash Expense
- Credit Card Expense
- Check Expense
Click the green Save Changes button at the bottom of the Item Details tab to confirm any changes before you export to QuickBooks Online.
You can manage your payment method list by navigating to Setup > Payment Methods. Here you can add, edit, delete payment methods, and link them to your QuickBooks Online bank accounts.
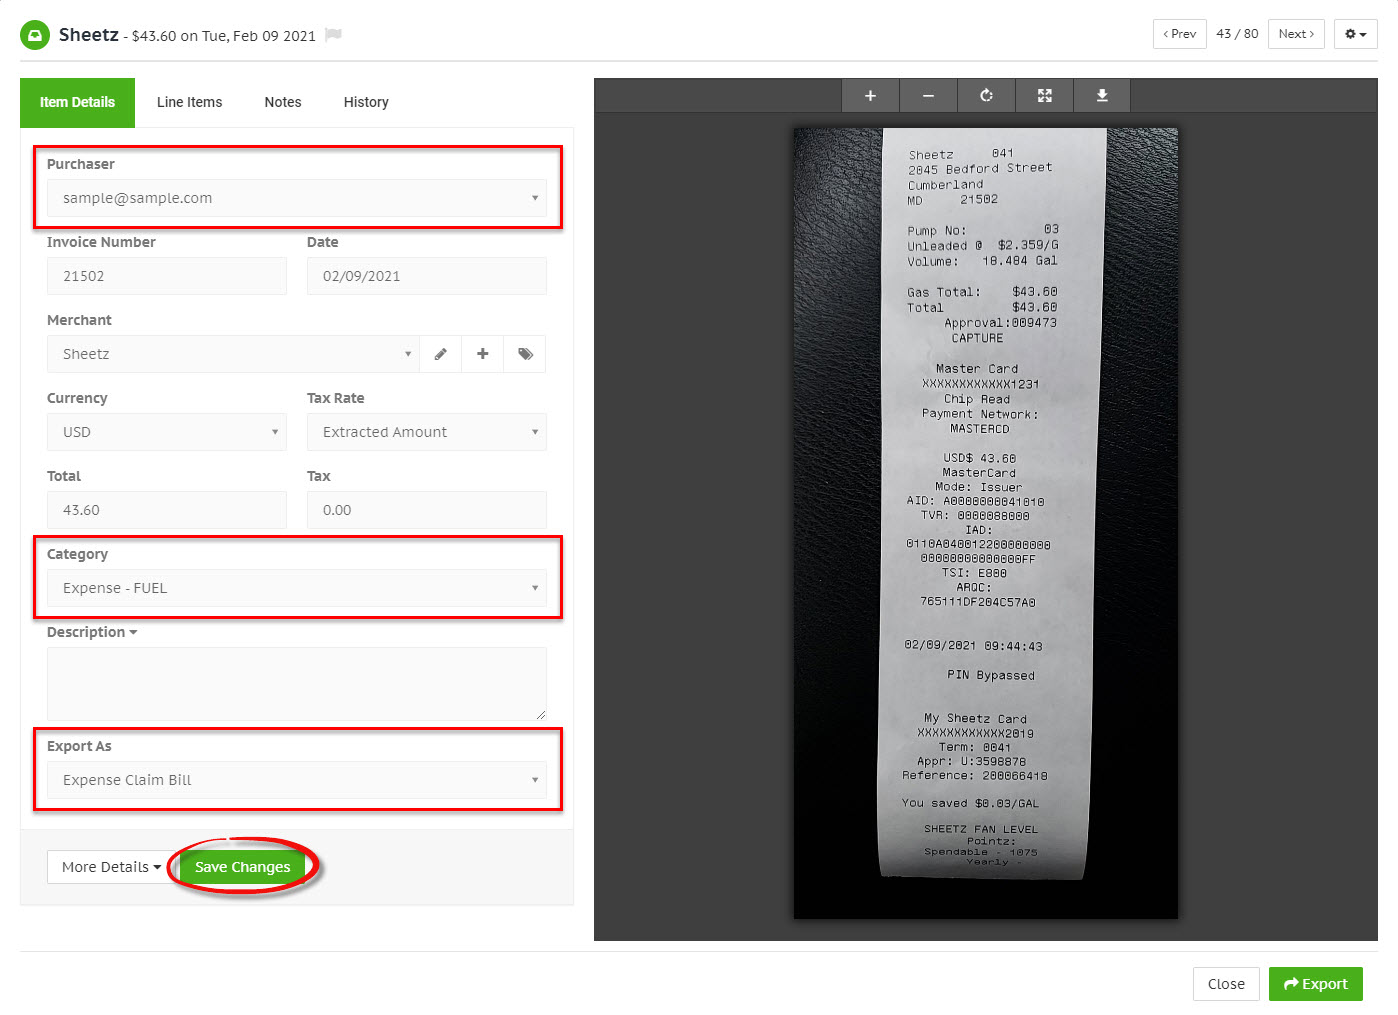
Expense claim bill
When you have receipts that need re-imbursing, you can export these to QuickBooks Online as an Expense Claim Bill. This is the same as exporting as a Bill, however instead of being payable to the merchant, the bill will be payable to the purchaser of the receipt.
If you have multiple receipts needing re-imbursement for a particular user, you can consolidate these into an Expense Report which can then be exported as a single item. See Expense reports for more information.
Select a Purchaser and a Category for the receipt, and choose Expense Claim Bill from the Export As dropdown list.
Click the green Save Changes button at the bottom of the Item Details tab to confirm any changes before you export to QuickBooks Online.
Vendor credit
Export as Vendor Credit when the merchant has issued a refund credit.
Select a Category for the receipt and choose Vendor Credit from the Export As dropdown list.
Click the green Save Changes button at the bottom of the Item Details tab to confirm any changes before you export to QuickBooks Online.
